| UWP MAGAZINE REVIEW – Issue 76 by PETER ROWLANDS Starting to use a heavyweight programme such as Adobe Lightroom can be a daunting task especially when there are no printed manuals any more so, as a Lightroom virgin I was delighted to be offered a review copy of Doug and Lorenza Sloss’s “Lightroom 4/5 for the Underwater Photographer’. It’s available as a digital download and the iBook format works on desktops, laptops and most usefully, iPads so long flight times can now be spent learning rather than playing Solitaire 🙂 Up until now I have used iPhoto mainly and Aperture occasionally and was looking at alternatives because they have an annoying and an increasingly Apple attitude of having to do it their way. For instance once you have imported your images it is actually quite difficult to find the original files because they are kept in a folder which you can only open if you know how to! Lightroom and I got off to a very good start when Doug told me that I can store my images where I want them and Lightroom only refers to them rather than imprisons them. The second good start was just a few minutes into Doug’s presentation when he encouraged me to consider using an external hard drive so that I could easily switch from my desktop to my laptop and still have access to my complete library. At present the photo libraries on my desktop and laptop are not the same because I use the laptop while travelling and desktop while at home. I’m sure there’s a way of syncing them but I like Doug’s suggestion because it makes me feel more in control. Having learnt how to set up your files and scheduled a simple virtually foolproof back up system and imported your first batch of images it’s time to move on to the ‘Development’ stage where Lightroom offers you the most amazing array of controls which, if Doug wasn’t with you, could be way over the top. Fortunately Doug’s calm presentation is paced just right to give you information you can remember without overload. 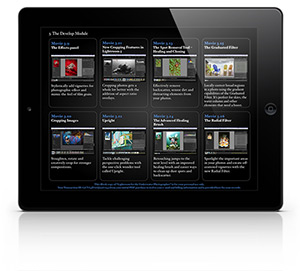 As a Photoshop user I’m fairly comfortable working with colour correction and enhancement but I still learnt a lot of new stuff watching the explanation of the multiple slider settings but it was in the Capture and Creative Sharpening that this app really shone out because it has always been a bit of a dark art to me and I have never really taken time to study it. Fortunately Doug was there to walk me through it and enlighten me about Sharpening, Radius, Detail and Masking followed by very useful guidance on how to reduce noise both colour and luminance. By the end of this 17 minute section I had had a whole new world opened up to me. As a Photoshop user I’m fairly comfortable working with colour correction and enhancement but I still learnt a lot of new stuff watching the explanation of the multiple slider settings but it was in the Capture and Creative Sharpening that this app really shone out because it has always been a bit of a dark art to me and I have never really taken time to study it. Fortunately Doug was there to walk me through it and enlighten me about Sharpening, Radius, Detail and Masking followed by very useful guidance on how to reduce noise both colour and luminance. By the end of this 17 minute section I had had a whole new world opened up to me.The beauty about this sort of presentation is that after such a full on learning curve you can pause to make a cup of tea or do something else until you feel ready to learn more. By the time I had got to the end of the Development Section I had been shown how to manipulate my images in any way whatsoever, should I want or need to. Even at this stage I felt that it was already worth the full asking price of $108 (£66) (€79). (There is currently a Seasonal offer on but it may have expired by the time you read this). My confidence in how to achieve improvements quickly and efficiently was growing as was my enthusiasm to do so but I wasn’t even half way through yet! The best way I found to work with Doug’s presentations was to have my trial version of Lightroom open so I could pause Doug and produce the same effect he had been talking about on one of my own images. This helped me get to know my way around Lightroom and it worked well for me. Once you’ve produced your final images you need to know how to export them because Lightroom, unlike Photoshop, does not save your images, just your adjustments. Doug goes through every type of export requirement possible including watermarking and publishing to social media such as Facebook and Flickr. Following this there is a section about working with Photoshop but by this time I had already come to the conclusion that Lightroom would be my one stop source for my images and anyway my version of Photoshop is old (CS4) and I begrudge being forced into subscription payment software so this section didn’t apply to me. However if it is anything like the Develop tutorials up Photoshop users will have another excellent resource to learn from. Following this is a section on outputting your material (as opposed to exporting images) and this covers making on screen books, print blurb.com books, create and export a slideshow as well as printing images getting the right ICC profile for great looking prints. The final presentation in this section is how to create great web modules and Doug showed how easy it was by changing styles and content to produce beautiful web galleries. I look at a lot of UwP readers websites and in the past I have been very impressed by the attractiveness and performance of their galleries. I’m not as impressed now; now that Doug has shown me how easy it is in Lightroom! Listening to and watching Doug’s presentations has done 2 things for me; I have learnt a great deal about Lightroom which I don’t think I would have learnt from a book and I have also found out how excellent Lightroom is. As a result I have bought Lightroom and ditched iPhoto and Aperture. 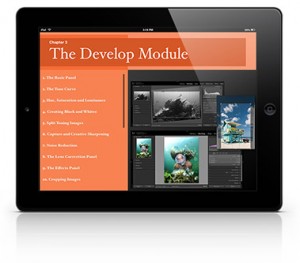
Finally Doug’s iBook will always be on my iPad so when I’m traveling with time on my hands I will relish this to brush up on my Lightroom knowledge watching Doug’s excellent presentations. |
| WETPIXEL REVIEW by ADAM HANLON Introduction I’ll start off by getting one thing straight from the outset: I really like this product! I have been a long time Lightroom user, having worked with each version commencing with the first version. It forms the basis of my image management and processing system, both in the field and at home with occasional round-trips out to Photoshop. As I am typically an early adopter, when Lightroom was released, I bought into it and then spent a great deal of time figuring out how to make it work! I relied on some books that were available at the time, and a large amount of time making mistakes and trying to figure out how to rectify them. Whilst this approach does work eventually, I don’t recommend it. Nevertheless, given that I have now been working with the various incarnations of Lightroom since 2007, I now consider myself a fairly advanced Lightroom user. |
| Lightroom for the Underwater Photographer consists of over 15 hours of tutorials, split up into 68 individual lessons. Lightroom is itself designed to follow a logical (?) series of steps, and the sessions also mimic this progression. Doug and Lorenza Sloss completely re-shot and re-scripted the entire film when Lightroom 4 was released, as its new features warranted a completely new product. Lightroom 5 was a more evolutionary change, so the changes are introduced via separate individual tutorials. For those that wish to upgrade their copy, Doug and Lorenza offer an upgrade path that allows the user to download the Lightroom 5 specific films for $19. |
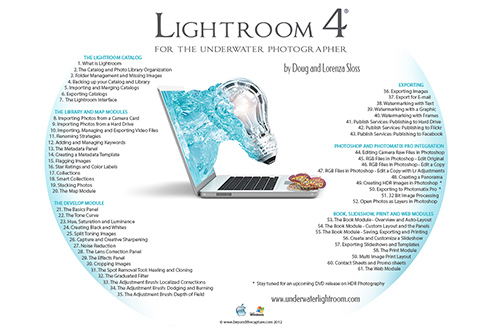
Lightroom for the Underwater Photographer is divided into seven chapters: 1. The Lightroom Catalog. 2. The Library and Map module. 3. The Develop module. 4. Exporting. 5. Photoshop and Photomatix Pro integration. 6. Book, Slideshow, Print and Web modules. 7. Extra new features in Lightroom. |
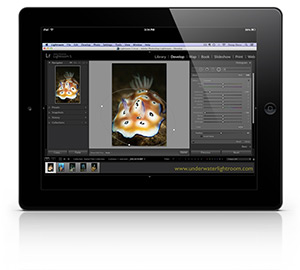
| It starts with the basics of understanding how Lightroom works, importing, keywording, smart previews, collections, managing metadata, flagging and labeling images, stacking and the map module. It also deals with importing, managing and exporting video files. Each lesson uses video screen captures of the Lightroom user interface combined with a step-by-step commentary given by Doug that explains in detail the steps that he is making. In addition, critical controls, steps and keyboard shortcuts are emphasized with text banners on screen, and specific keystrokes or tool tips are given a magnified loupe view. |
 They then move on to the develop module and utilizing a similar approach, takes the user through pretty much all the adjustments that are possible. These include the basic, curves, HSL, split toning, detail, lens correction, effects and camera calibration panels. It also deals in depth with the tools available, including crop, spot removal/advanced healing brush, radial filter and adjustment brush. Doug uses actual images (the bulk of them shot underwater) to show how the adjustments effect their appearance and impact. They then move on to the develop module and utilizing a similar approach, takes the user through pretty much all the adjustments that are possible. These include the basic, curves, HSL, split toning, detail, lens correction, effects and camera calibration panels. It also deals in depth with the tools available, including crop, spot removal/advanced healing brush, radial filter and adjustment brush. Doug uses actual images (the bulk of them shot underwater) to show how the adjustments effect their appearance and impact. |
| When I am trying to explain Lightroom to other photographers, particularly those with experience in Photoshop and Bridge, I often find that they struggle to grasp the concept that you rarely “save” images within the program. Of course, when we export out of Lightroom however, we do create “saved” versions of these images. The tutorials sequence follow this logically, by offering an in-depth explanation of the export process, including exporting directly to third-party image publishing sites like Facebook and Flickr. Doug then explores round tripping out of Lightroom into Photoshop and Photomatix. Most photographers agree that Lightroom is capable of a large percentage of image processing but there are still things, like large-scale backscatter removal, that are easier or better accomplished in Photoshop. Photomatix is a powerful app for producing HDR images, again not something that can currently be accomplished within Lightroom. Doug shows how to set this up correctly, so that images edited in external programs can be added automatically back into Lightroom, easing the asset management headache of trying to keep track of multiple images. The last major set of videos explores the options that Lightroom offers for creating books, slideshows, web page output and prints. One area that is not covered within this is creating time lapse films from within Lightroom. Many photographers are using third party apps like LRTimelapse to create sequences straight out of Lightroom’s slideshow tab and it would be great to see this covered in a future lesson. The last lesson covers some additional specific new features in Lightroom 5 including “full screen” mode, setting target collections, locking zoom on multiple images for comparison and updates to the book module. |
Delivery Doug’s original tutorials were supplied on multiple DVDs, however the delivery method has evolved in line with the general move towards digital delivery. The Lightroom 4 series were originally supplied on a USB flash drive, but when Doug Sloss first sent me the tutorials for review, I was able to download them as video files embedded into a pdf document. The file size is 1.99GB so it is not a quick download, but once it is on a computer, the files are fairly portable. Doug’s original tutorials were supplied on multiple DVDs, however the delivery method has evolved in line with the general move towards digital delivery. The Lightroom 4 series were originally supplied on a USB flash drive, but when Doug Sloss first sent me the tutorials for review, I was able to download them as video files embedded into a pdf document. The file size is 1.99GB so it is not a quick download, but once it is on a computer, the files are fairly portable. |
Unfortunately, pdf embedded videos are not supported on iOS devices. I spend an unfortunately large amount of time on airplanes, and have found that the iPad is my tool of choice for on-board entertainment. When I mentioned this to Doug, he informed me that he was waiting for Apple to release iBooks for Mac. The Mavericks release in November addressed this, and within days, Doug had got the videos in an iBook format that can be viewed on iOS devices (it is still a 1.91GB download). I have just endured some long flights, and can report that for me at least, this is the ideal way to interact with the tutorials. |
| In both cases, the tutorials are registered to an individual, and this information is embedded into the iBook/pdf. This is in an attempt to curb unethical sharing of the lessons between individuals. However, there is no practical limit as to how many of your devices you can load your own copy onto. This means that you can have them on your iPad, iPhone and Mac or PC simultaneously, so can watch them using whichever device is closest to hand at the time. I actually found that watching the videos on my iPad, whilst having Lightroom open on my Mac, helped me to put the ideas that Doug was listing straight into practice and hence I remembered them better. In addition, they can act as reference materials during editing sessions. |
| Conclusion When I conduct workshops, or lead trips, I am often surprised at how little photographers know about post processing images. Whilst I definitely fall into the school of believing that good photographs are created in camera rather than in post, many experienced photographers seem to lack even basic knowledge of applying copyright information to an image’s metadata for example. Lightroom for the Underwater Photographer addresses these relatively basic issue and provides a no-nonsense practical guide to sorting out an effective workflow. |
 So I began this review stating that I really liked this product and should now justify that statement! So I began this review stating that I really liked this product and should now justify that statement!I feel that the lessons address users with all levels of ability. If you are new to Lightroom, it will give you a massive head start in getting to grips with the program and will definitively ease the steep learning curve involved. If you have been managing and enhancing your digital assets using other programs like Photoshop or Bridge, these tutorials will not only explain the difference between the way these programs work and Lightroom, but will get you started out in a way that will help make your transition as painless as possible. |
| If, like me, you have been using Lightroom for a while, you will be amazed at how many tips and tricks Doug incorporates into the lessons. I think that most of us get used to a workflow and ignore or fail to register other functions or options that may be available within the program. I must admit that as soon as I watched an episode, I couldn’t wait to go and try out some of the things that the videos illuminated. I was surprised at just how much I learnt and how it has improved my workflow. Hence highly recommended.by Adam Hanlon, www.wetpixel.com |
| DivePhotoGuide Editor Review – Lightroom 4 for the Underwater Photographer By Hergen Spalink – www.gotmuck.com Somewhere along the line we all “lose” some images as we strive to organize our ever growing library. Most of us now use some sort of organizational tools, with the most popular offerings being Adobe’s Lightroom and Apple’s Aperture. Both of these programs are now several iterations deep and seemed neck and neck until Apple’s development seemed to stall and Adobe pulled vastly ahead. For most users, during the initial iterations of both Lightroom and Aperture, the majority of major editing took place in an external program such as Photoshop. With the latest iterations of Lightroom, many of the commonly used edits found in Photoshop are now available in Lightroom, in a non-destructive and disk-space saving manner.Tapping into the huge potential of the tools now at our fingertips is daunting, especially for the underwater photographer as most books and online tutorials are aimed at making brides look better or fixing the color of the grass. Filling this gap are Doug & Lorenza Sloss. Their tutorial DVD for Lightroom 3 and Photoshop are standard equipment for any and all underwater photographers of all skill levels. Doug’s celar and concise tutorials have saved many a marginal image and helped make great ones even better. Their latest offering is no different. Lightroom 4 has significant improvements over its predecessor, Lightroom 3, including, but not limited to, enhanced video support and extended publishing options as well as some added adjustments. Lightroom 4 for the Undewater Photographer contains over 13 hours of tutorials that take the user from setup of Lightroom to importing, editing, and publishing their final product in print or web form.The Layout: The Sloss’ have ditched the DVD in favor of a flash disk for this version, great news for those of us without DVD drives. The drive is not platform centric and can be launched on either a mac or PC. The menu is broken down into 6 sections with a total of 61 tutorial videos. Once clicked the videos open in a separate window, making it easy to reaccess the main menu at any time and have multiple tutorials open at the same time, very simple and intuitive. The naming scheme is clear and concise, with each video doing just what it says on the tin.
The Tutorials: The flow of tutorials follows a logical order beginning with the explanation of what Lightroom can do and how to get your images into the system. The next section involves organizing and sorting your images into manageable subsets followed by the most robust section – developing your images. Many of these tutroials are reminiscent of the Photoshop Tutorials in Doug’s earlier offering, but now take advantage of the non-destructive environment of Lightroom. Finally, the tutorials are rounded out with the sections covering Photoshop and 3rd Party HDR integration as well as publishing to various media including Slideshows, Print, and the Web. Final Comments: By Hergen Spalink – www.gotmuck.com
|
| THE BEST POST-PROCESSING TOOL FOR THE UNDERWATER PHOTOGRAPHER – Lightroom 4 for the Underwater Photographer By Sam Hodge – South Florida Underwater Photographic Society “How was your dive,” asked the Captain upon my entry back to the boat. “Absolutely fantastic,” I muttered as I was thinking of the amazing photos I had just taken with dozens of Barberfish. Like most photographers you later realize that perhaps those shots taken really weren’t as you remembered. Closer inspection on a computer showed the white balance too cold, the exposure too bright, colors were missing, and lost detail to shadows. However, post-processing your images with a tool like Adobe Photoshop Lightroom® will allow you to keep from tossing aside some of your favorite images. Lightroom® alone is just the start of your post-processing journey.In my opinion, the best tool accompanying any underwater photographer is the “Lightroom 4 for the Underwater Photographer” series developed by Doug and Lorenza Sloss. This multimedia rich set of 61 video tutorials covering the 6 basic functions for using Lightroom® is the best learning tool for both the amateur and professional photographer. Doug and Lorenza narrate your learning with such meticulous detail making it possible for even those with limited computer skills to turn decent photos to impressive images worthy to showcase around the home.Most underwater photographers are challenged with keeping their photo library organized and that is precisely where the tutorials start you off in your learning. This was my biggest obstacle the tutorials helped me to overcome when managing thousands of photos. I can now quickly find that “photo in a haystack” with a simple search using Doug and Lorenza’s methods. Along with organizing your catalogs, the tutorials go into tremendous detail on the importance of rating, labeling, adding keywords, and managing your metadata within each photo. This is important to protecting your copyright inserted into each image file.Now that you got the basics down the tutorials take you through the learning process in training you how and when to use each image correction tool. Believe it or not, there is an order to making color corrections, and the reasons are clearly communicated in this series. After an image is processed to your satisfaction, the series explains the various built-in Lightroom® features for exporting and publishing your collection. These tutorials enable you to learn how to create slideshows, books, web modules, or simply how to print an image. Advanced users can also take advantage of the tutorials on integrating Adobe Lightroom® with Adobe Photoshop®.It’s evident it took Doug and Lorenza years to master this knowledge and compile in a user-friendly series. Yet with a few hours of practice you can enjoy your photos with a whole new appreciation.By Sam Hodge – South Florida Underwater Photographic Society |